Friday, December 10, 2010

Red and Green Blog Hop

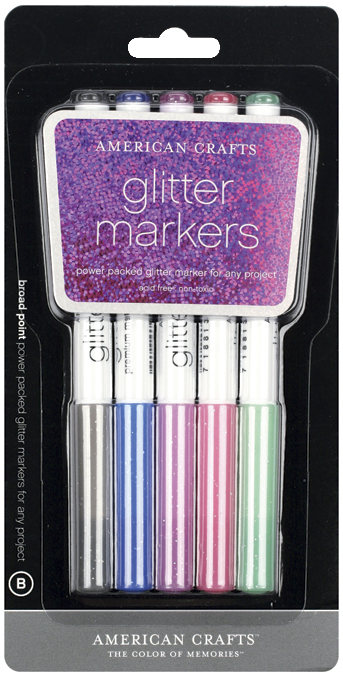
Welcome to the Cutters Creek Red and Green Blog Hop! Our wonderful design team members have all created some fun Christmas projects to inspire you! The only requirement for the projects were that they must contain Red and Green. You just saw a fabulous project on Kim B's blog. Your next stop along the hop will be Lori B's blog. If you are just finding our hop please head over to the Cutter's Creek Design Team Blog to start from the beginning. There are 8 inspiring projects for you to check out as well as 8 chances to win a great prize from Cutters Creek!  Please leave me a comment about your most memorable gift - either sent or recieved. One entry per person please!  Comments left up until 11:59pm on Sunday December 12th will be eligible to win. All winners will be selected Monday and posted on each blog so make sure you check back to see if you have won! You will have 48 hours to respond before we choose another winner.  My prize will be a wonderful set of American Crafts Glitter Markers. 
Here is the project that I have created for today's hop.

This was my second card with no image - just a sentiment.  However, I decided to jazz this one up just a n otch and added LOTS and LOTS of BLING.  The base of my card was cut on Bazzill Bling paper in Evergreen.  This paper has a very slight sheen to it to make it sparkle.  I used a piece of Core'dinations Gemstone 12"X12" Cardstock Assortment in a cranberry color - also sparkly, and cut it one inch smaller than the front of my card.  This piece was embossed with the D'Vine Swirls folder in my Cuttlebug. 

The sentiment was cut on my Cricut Expression, using my Gypsy and the Gypsy Wanderings cartridge.  The base was cut with the American Crafts Foil in dark green.  There are LOTS of colors in this pack to choose from - it is a wonderful paper to work with and cuts nicely on the Cricut.  It IS very heavy though, and requires multiple cuts to get it out clean.  The top layer of the sentiment is American Crafts Glitter paper in Mint

This sentiment had a pretty flower on it.  Rather than try to hide it, I decided to dress the flower up with some Polar White Flower Soft.  Using the Flower Soft Glue, the product stuck nicely even to the glitter paper!  If you're new to Flower Soft, like me, here's a tip - always rinse out the applicator tip of the flower soft glue after using it.  It took me a while to clean out the dried glue from the applicator before I could use it again!

Finally, I had all the layers ready to put my card together.  I used ribbon from my stash to wrap the embossed cardstock, tying it with a simple knot.  I attached this piece to the base with my Glue Glider Pro.  For the sentiment, I attached the glitter paper to the base using my Sakura Quickie Glue Pen, which works great with small areas!  Since the knot from my ribbon was in the middle, I used Glue Dots Pop-Up Dots to raise the sentiment up over the top of the knot, and jump off the card.

I hope you enjoyed my project...and the rest of the hop!!

Thursday, December 2, 2010

*Wish* Card

With the holidays fast approaching, many crafters have holiday cards on their minds! I originally made this card for a card challenge, but didn't get a chance to put it up in time. The challenge was to create a holiday card with words only - no images. With my new Gypsy, there are a bunch of phrases on the Gypsy Wanderings cartridge that were possible to use!

I started with some basic deep blue Bazzill card stock. I wanted to have this be a unique size, so I cut the card to 12x6. I folded the card in half with my Scor Pal to make it a 6x6 card. Next, I cut a piece of lighter blue cardstock one inch smaller on both sides, so that I had a full half inch border around it. Instead of cutting straight lines, I used the antique blade on my Purple Cow paper trimmer to give the edges a little interest. (I LOVE the interchangeable blades on this trimmer - I know I'm going to have fun with it!) I folded the blue paper in half with the Scor Pal as well. To give the light blue cardstock some texture, I ran it through the Cuttlebug D'Vine Swirls embossing folder. The texture of the deep blue base and the light blue embossed card were begging for more interest, so I inked the edges of each of these papers, plus portions of the embossing, with a white ink pad. Creative Memories now sells chalking ink, so I gave that a try! The stamp pads are small, which should be easy to work with, but I am not convinced that these are the product for me. I'll have to try the other colors that came with the set before I can make a decision on them :). Before I attached the textured paper to the base, I added a shiny, transparent ribbon with a simple knot to the card.

Next, it was time to cut the words. The shadow of the word 'Wish' was cut on American Crafts silver foil. The top layer of the "Wish" sentiment was cut on light blue American Crafts glitter paper. This AC Glitter paper is THE BOMB! It takes several passes on the Cricut to get the cut clean, but with a little patience, even the most intricate of cuts can be done with this glittery paper - and it doesn't make a mess! The knot of the ribbon makes it slightly more difficult to attach the sentiment, but to get around this, I used 3D Foam corners to make the verbiage the same height.

This is a simple, elegant and EASY card to make for last minute holiday sentiments!

Please leave a comment for me...and if I get 20 comments, I may even send this card to one lucky winner! Make sure to leave your e-mail address so I can contact you!!

Tuesday, August 17, 2010

Ecstasy Cards - Embellishments

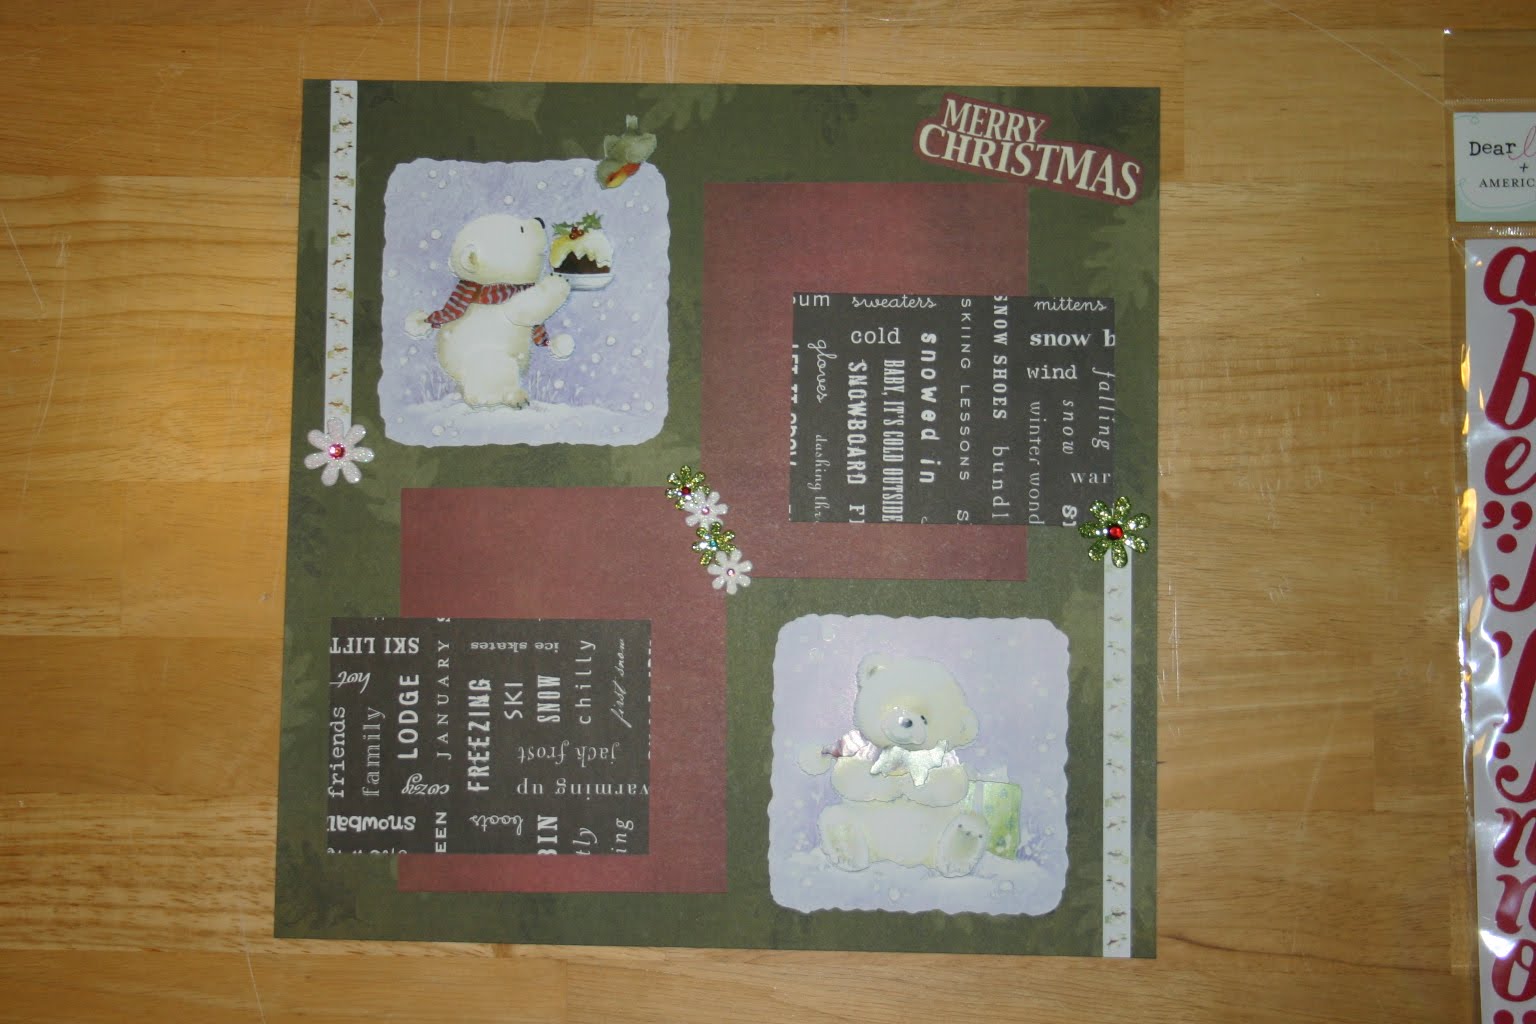
I was lucky enough to get a sample of some really cute bears from Ecstasy Crafts. Typically, these are used by card makers to develop some fast and beautiful card work. Since I am more of a scrapper than a card maker, I thought I would try to use these in a scrap layout instead!


These are incredibly easy to work with. They come on all printed out on a single sheet of glossy paper. The pieces are perforated, and they pop out with very little effort - even the little ones! The edges are perfect - not like some die cuts where you have to trim off the little pieces where they were attached to the main sheet! I used foam dots to 'lift' the various pieces up off of the piece below it. This was like doing a paint-by-number. I started with the base piece, which included the pretty blue snow background, and added each piece sequentially, overlapping as needed. I tried to take a picture from the front so you could see how many layers each bear has.


I used paper I already had in my stash to set up the base layouts. I prefer symmetry in my work, so each side had the same size papers. The two bear paper piecings came on a single sheet that had a lovely matching strip of paper that resembles ribbon. I cut it in half and used each piece to accent the bears. Finally, I used some glitter Prima flowers to add some bling to my page and a simple Merry Christmas cutout to give my page a title.

So if you get a chance - try out the new Ecstasy products for fast, easy and beautiful projects!

Thursday, July 15, 2010

Sympathy Card

It's always a sad day when someone passes away...and it's hard to create a card in the heat of all those emotions. I can never come up with an idea that is subtle and sensitive, but still shows some originality and creativity. Then, I got my hands on one of the Cuttlebug Oriental Weave folders, and I knew that it was perfect for just these occasions.


I made my 5 x 7 card base out of some paper I had on hand. I cut a piece of Bazzill card stock a half inch smaller than my card, and ran it through the Cuttlebug. I ran it through several times, just to make sure I had a sharp emboss.


Next, using a simple foam brush, I used my Tim Holtz Distress Ink Pads in Walnut Stain to darken up the bamboo shoots. I used a Copic marker to color the bamboo leaves.
My sentiment was cut with the Wild Card cartridge. This cartridge has some great sayings, but it can be difficult to size them when using them separate from the cards. I like to use Design Studio, even when just cutting a simple image, because I can make it exactly the size I need, without having to fuss with the settings on my Expression. I mounted the saying with my Sakura Quickie Glue pen on a simple piece of vellum, with a few corners rounded with my Corner Chomper to give it a little style.


The final product is a simple, subtle card that relays my thoughts and still allows me to be a designer.

Wednesday, May 12, 2010

Graduation Card & Pin


My son is a senior in high school this year, and I was amused by the way they called themselves "SEN10RS", designating the class of 2010. So, I thought I would create a file in Design Studio that imitates that. The font is Base Camp. I emphasized the '10' by making that slightly larger than the other letters, and cutting it in a different color. This portion is not actually adhered to the card. I have attached a tiny safety pin to the back of this piece, so that the kids can wear their 'Sen10rs' like a pin (or a bow tie, as my son says!). I also made a file that has three 'Sen10rs' pieces together, folded in a triangle, which will make a nice centerpiece at the graduation party ;-)! The basic .CUT file for the Sen10rs piece can be found HERE.

The card base is the graduation cap from the Locker Talk cartridge. I figured out what size I wanted for the cap, and then 'copied, welded, flipped and rotated' my copy to the top of the first cap. I overlapped them slightly, so that there is a tiny fold at the top of the card. I cut the tassle in the school color, and the top button of the cap is in gold. The tassle itself is actually a solid cut, but I found that too bland, so I used my scissors to cut 'fringe' into the tassle. My .CUT file can be found HERE.

We have over a dozen seniors, and each of them will get a card and pin at the final band concert in a few weeks. I think the simplicity of this card is what makes it so nice. I will be able to easily create as many as I need, without too much hassle!

Sunday, April 11, 2010

Spring Card

Here's an easy card for a lovely spring thought! It was made from a pre-folded card & envelope set, so I didn't have to fuss with envelope sizing.


First, I stamped Lily from Pink Cats Studios - Billy & Lily Sweethearts on my Prism paper with Memento Ink Tuxedo Black, and colored her with Copics. I cut her out really close with Cutterbee scissors...I love how sharp those little scissors are! Next, I used two embossed borders from the Cuttlebug Emboss A2 Border Frills set. The lace-look border was set at the bottom of the card, and I cut around the embossing to show the curved edges on the bottom. I placed the pink floral border slightly above the bottom, and used a fun, decorative ribbon between the two borders. The ribbon is held in place with Scor-Tape. I tucked Lily in to the top of the pink flower border. To show off the lace border, I used a piece of the same pink cardstock on the INSIDE bottom of the card. I highlighted a few of the flowers in the middle pink border using Flower Soft Summer blend and Flower Soft Glue. The pink hydrangea flowers are set in place with Glossy Accents and a Twinkle Jewel. I have discovered that many 'dimensional' items can be 'glued' in place with Glossy Accents - it sets up hard, so that your embellishment won't fall off! Finally, I cut my title phrase with my Cricut and the Lyrical Letters cartridge. The shadow of this font is clean, and easy to cut very small - this one was cut at 3/4".

Cutters Creek Items Used:
Pink Cats Studios - Billy & Lily Sweethearts
Prism Paper
Memento Ink - Tuxedo Black
Copic Markers
Cutterbee Scissors
Cuttlebug Emboss A2 Border Frills
Scor-Tape
Flower Soft Summer Blend
Flower Soft Glue
Glossy Accents
Twinkle Jewels
Lyrical Letters Cartridge

Monday, March 29, 2010

Check out this Blog Candy!

I just found this as I was hopping around the blogspace today:

Candy time! We got Candy! AnaryAtelie!


Check out her blog...she has some really CUTE stuff out there! And enter the contest for some great blog candy!!